shoes(and)shoelaces=style it up!

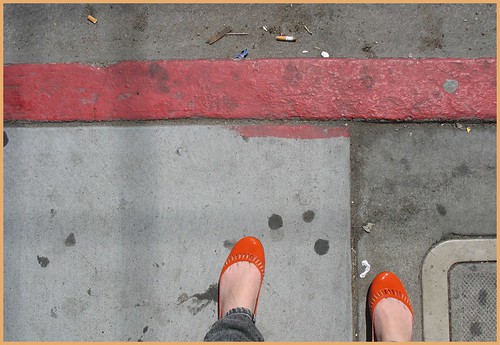
older:gutter feet

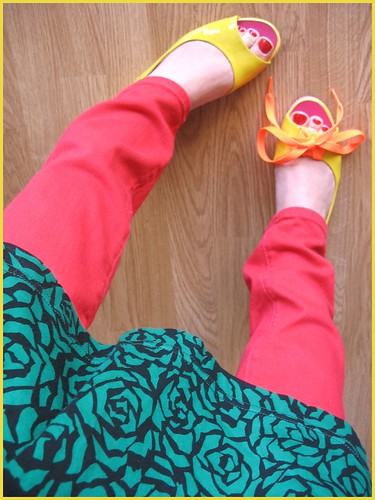
newer: new shooz

found the yellow pair today while shopping on haight street. as i walked up to the register to purchase them, i saw a big rack of brightly colored sneaker shoelaces on a rack on the wall, and had an fashion-y epiphany: why not buy some shoelaces to fancy up some of my shoes, particularly those of the peeptoe variety? i bought some orange fluorescent laces and gold metallic laces to play around with.

***

shoelaces come in a million colors, widths, and lengths. be creative! shoelaces can be used in so many ways. here are some quick styling ideas:

-form a bow on the top of your shoe...simply tie it on like i've done here (wrapping around until the shoelaces are shorter to make a nicer, smaller bow), or use a leather punch to form holes in the top of your shoe, and thread through.

-utilize them as an ankle straps...some shoes come with a little loop on the back near the heel. simply slip the shoelace through and tie on your ankle as you wish! criss, cross, and tie high, or let them slouch low and relaxed around your ankle.

-use them decorate the edge of a plain vintage pump, flat or sneaker in your closet or that you've thrifted: punch holes @ regular intervals along the edge of a shoe with a leather punch, then thread the laces in and out of the holes. you could even do a single crochet stitch around the edge (if you know how to crochet!), a blanket stitch, or whipstitch. instead of shoelaces, you could use great yarn or strips of fabric in the same way...how cool would that be?

the possibilities seem endless, really! make suggestions for more uses! i'd love to hear them.

***

i leave you with a thought:

maybe original, trendsetting style comes partly from looking at things in a new manner/from a new perspective...in other words, "how can i interpret this (new or old) item/thing in a *new* way?"

that is what is really quite beautiful about the fact that the world is populated with unique human beings, who are, in theory, all DIFFERENT. we all have different dna, different cells, different bodies, different minds, different life experiences. we're all arguably bound to look at the world around us in different ways. with those differing viewpoints come different thoughts, different ideas...sometimes even completely new and original ones! it's such a beautiful thing!

as one of my missions in life, i want to celebrate, and elevate that difference. difference is what makes us all interesting and special!
zig(zagged)

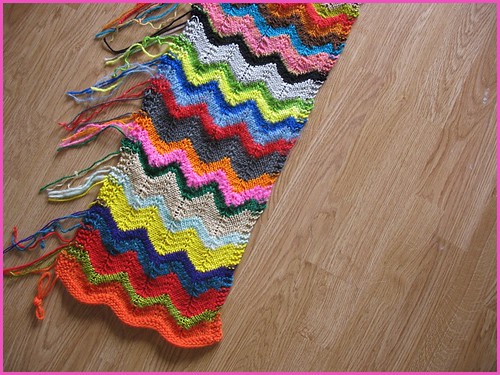
the riotously colored zig-zag knitted scarf i started about a month or so ago is still in progress! i've been knitting away at it this week like a fiend.

zig zag scarf

it's one of those mindless sort of knitting projects that i love. the stitch pattern is ridiculously easy to knit as well as remember, there's no need to refer to any written instructions. i do like the challenge of doing special, complicated knitting stitch patterns in my knitting from time to time, but i REALLY, REALLY enjoy simple ones that are easy to remember, like this one, and the feather and fan stitch like i used on this scarf from a while back. both are stitch patterns that look complicated but aren't. they both provide a lot of visual interest and lovely texture.

fun fact about this here zig-zag scarf? i'm using little bits of yarn from my stash to make it...so far i haven't used a yarn twice. gives you an idea of the ridiculous amount of yarn hanging around in the ye olde bits and bobbins atelier. :P all the yarns are either jumper weight, sport weight, or worsted (most are the latter).

i'm making it up as i go along, adding colors and textures in as i feel like it, thinking, "hmm, i haven't used blue yarn in a while, better add some in again". i'm embracing the insanity. goes along with what i like to think is part of my fashion ethos: calculated craziness and clearly colorful.

i'll probably be finishing it soon. i'm thinking it would be cute as a sort of medium size scarf, that i can tie once at the neck for a big shot of color.

***

as far as a pattern, there's not much of one.

i'm a freestyle knitter to a great degree...i often don't use patterns. i just *knit*.

but here's the pattern, for anyone interested:

amount of yarn: unknown. several balls total? it's your call. however you want to stripe it.

needle size: i used a US 7, but use what works for you and your yarn. maybe a US 8 or 9? again, it's your call.

the stitch pattern is a multiple of 14 stitches, plus 2. you can add/subtract to the multiple by any multiple of two for thinner or wider zig zags.

i also added 5 stitches to each side of the scarf, for a garter stitch border (total of 10 extra), and separated them from the edge with stitch markers. you could eliminate this, but i think scarves look better when they have a border of some kind...they look "finished" to me.

start off with a couple rows of garter...your choice. something like 3-5 rows, for a little border at the end of the scarf.

stitch pattern:

row 1: (WS) k5, PM, purl to marker, PM, k5.

row 2: (RS) k5, slip the marker, k1, inc (by knitting into front and back of st), k4, sl 1, k1, psso, k2tog, k4, *inc in each of the next two stitches, k4, sl 1, k1, psso, k2tog, k4; rep from * to last 2 sts, inc in next stitch, k1, slip the marker, k5. row 3: (WS) k5, slip the marker, purl to marker, slip the marker, k5.

row 4: repeat row 2.

you can make wider or thinner rows by say, adding 4 more rows of a color, or just doing two...get it? so for the wider stripes i did 8 rows, and the thinner ones, only 4.

there is absolutely no rhyme or reason to the pattern of my stripes or the colors. i put a thicker stripe in when i felt like it, and added colors as i felt like it. of course, you could plan yours out. i wanted something organic and chaotic. you're the boss. make it your own! no need to copy mine explicitly! the neat thing is that if you use bits from your stash, the yarn mix is a direct reflection of you and what colors and textures you favor...and thus, it's a complete original!

make the scarf as long as you'd like.

finish off with the same number of rows you started with, in garter stitch only (k every stitch), and bind off all stitches. hide all the ends of yarn, too, of course.

you're done!

clip those skinnies!

two of the biggest staples of my closet are a.) skinny/slim cut jeans, and b.) boots. you too?

ever notice the pesky bunching that happens about the knees when wearing them together?

yeah?

sucks, doesn't it? wanna do something about it?

then this post is for you!

page 122 of the march 2007 issue of lucky magazine had a great little blurb about the elastic pant clips used by equestrians, and how they are a brilliant trick for avoiding the bunchy fabric that happens when one tucks the aforementioned slim or skinny jeans into the aforementioned boots.

here it is!:

skinny jean pant clips tutorial 1

okay, yes, you COULD just simply buy the elastic pant clips from an equestrian supply store such as dover's saddlery (the source mentioned in the lucky piece)...

OR you could make them yourself, like i did!

interested? up for a little DIY? it's RIDICULOUSLY easy!

what you'll need:

-two (2) pieces of elastic, 3/4" wide, and 7 1/2" long -four (4) suspender clips (1" size) -four (4) sewing pins -ruler -scissors -sewing machine -polyester thread to match the color of the elastic -pinking shears (optional)

skinny jean pant clips tutorial 2

for starters, you need to measure out two (2) lengths of 3/4" wide elastic. each one of these lengths needs to be about 7 1/2" long.

tip: if you desire a cleaner look and less fraying at the ends of these lengths of elastic, you can use a pair of pinking shears to make a smart zig-zag edge.

skinny jean pant clips tutorial 3

slip each of the ends of the elastic into the oval-shaped rings of the suspender clips (two for each length of elastic, natch), folding approximately 1" of the elastic down towards what will be the backside of your elastic pant clips, and pin in place, as in the photo above.

now it's time to head over to the sewing machine!

skinny jean pant clips tutorial 4

sew the fold down 1/4" away from the pinked/cut edge, and approximately 1/4" or 3/8" away from the clip, to hold the clip in place.

skinny jean pant clips tutorial 5

i recommend using a very, very narrow zig zag stitch, if your sewing machine has one, to give the stitch some stretch (as it's in that super stretchy elastic) so the stitches won't pop and break. i actually did two rows of stitching, one over the other, to make the stitching super durable.

skinny jean pant clips tutorial 6

and you're done!