• HELLO
  • ABOUT
  • WORK
  • BLOG
  • CONTACT
  • SHOP
Menu

tricia royal

textile artist and designer
  • HELLO
  • ABOUT
  • WORK
  • BLOG
  • CONTACT
  • SHOP
IMG_0281.jpg

52 weeks of surface design: weeks 8 and 9: relief printing and embroidery

May 29, 2021
IMG_0311.jpg

52 weeks of surface design: weeks 8 and 9: relief printing and embroidery

the last few weeks have been very busy for me, and i have not have much time for printing or painting. boo! hiss!

i’ve been working very, very hard, finishing up a series of memory quilts dedicated to my father, who passed away due to pancreatic cancer in 2015. i plan to gift them to my brothers, mother, and another family member for xmas, and the holidays are fast approaching…

however, i did sneak in a tiny bit of work on things relating to the 52 weeks project, before i got in over my head with the memory quilts (i’ll blog about them very soon!)…!

i took an evening and hand quilted the striped mini quilt seen at the top of this post, adding contrasting and complimentary colors to the printed lines. this mini was an experiment; i wanted to see what kind of effect i would get if i added another element of surface play to my printed motifs. i want to make a series of larger quilts with this added stitching, perhaps leaving some motifs unstitched and/or only stitching some motifs and see what overall effect it produces.

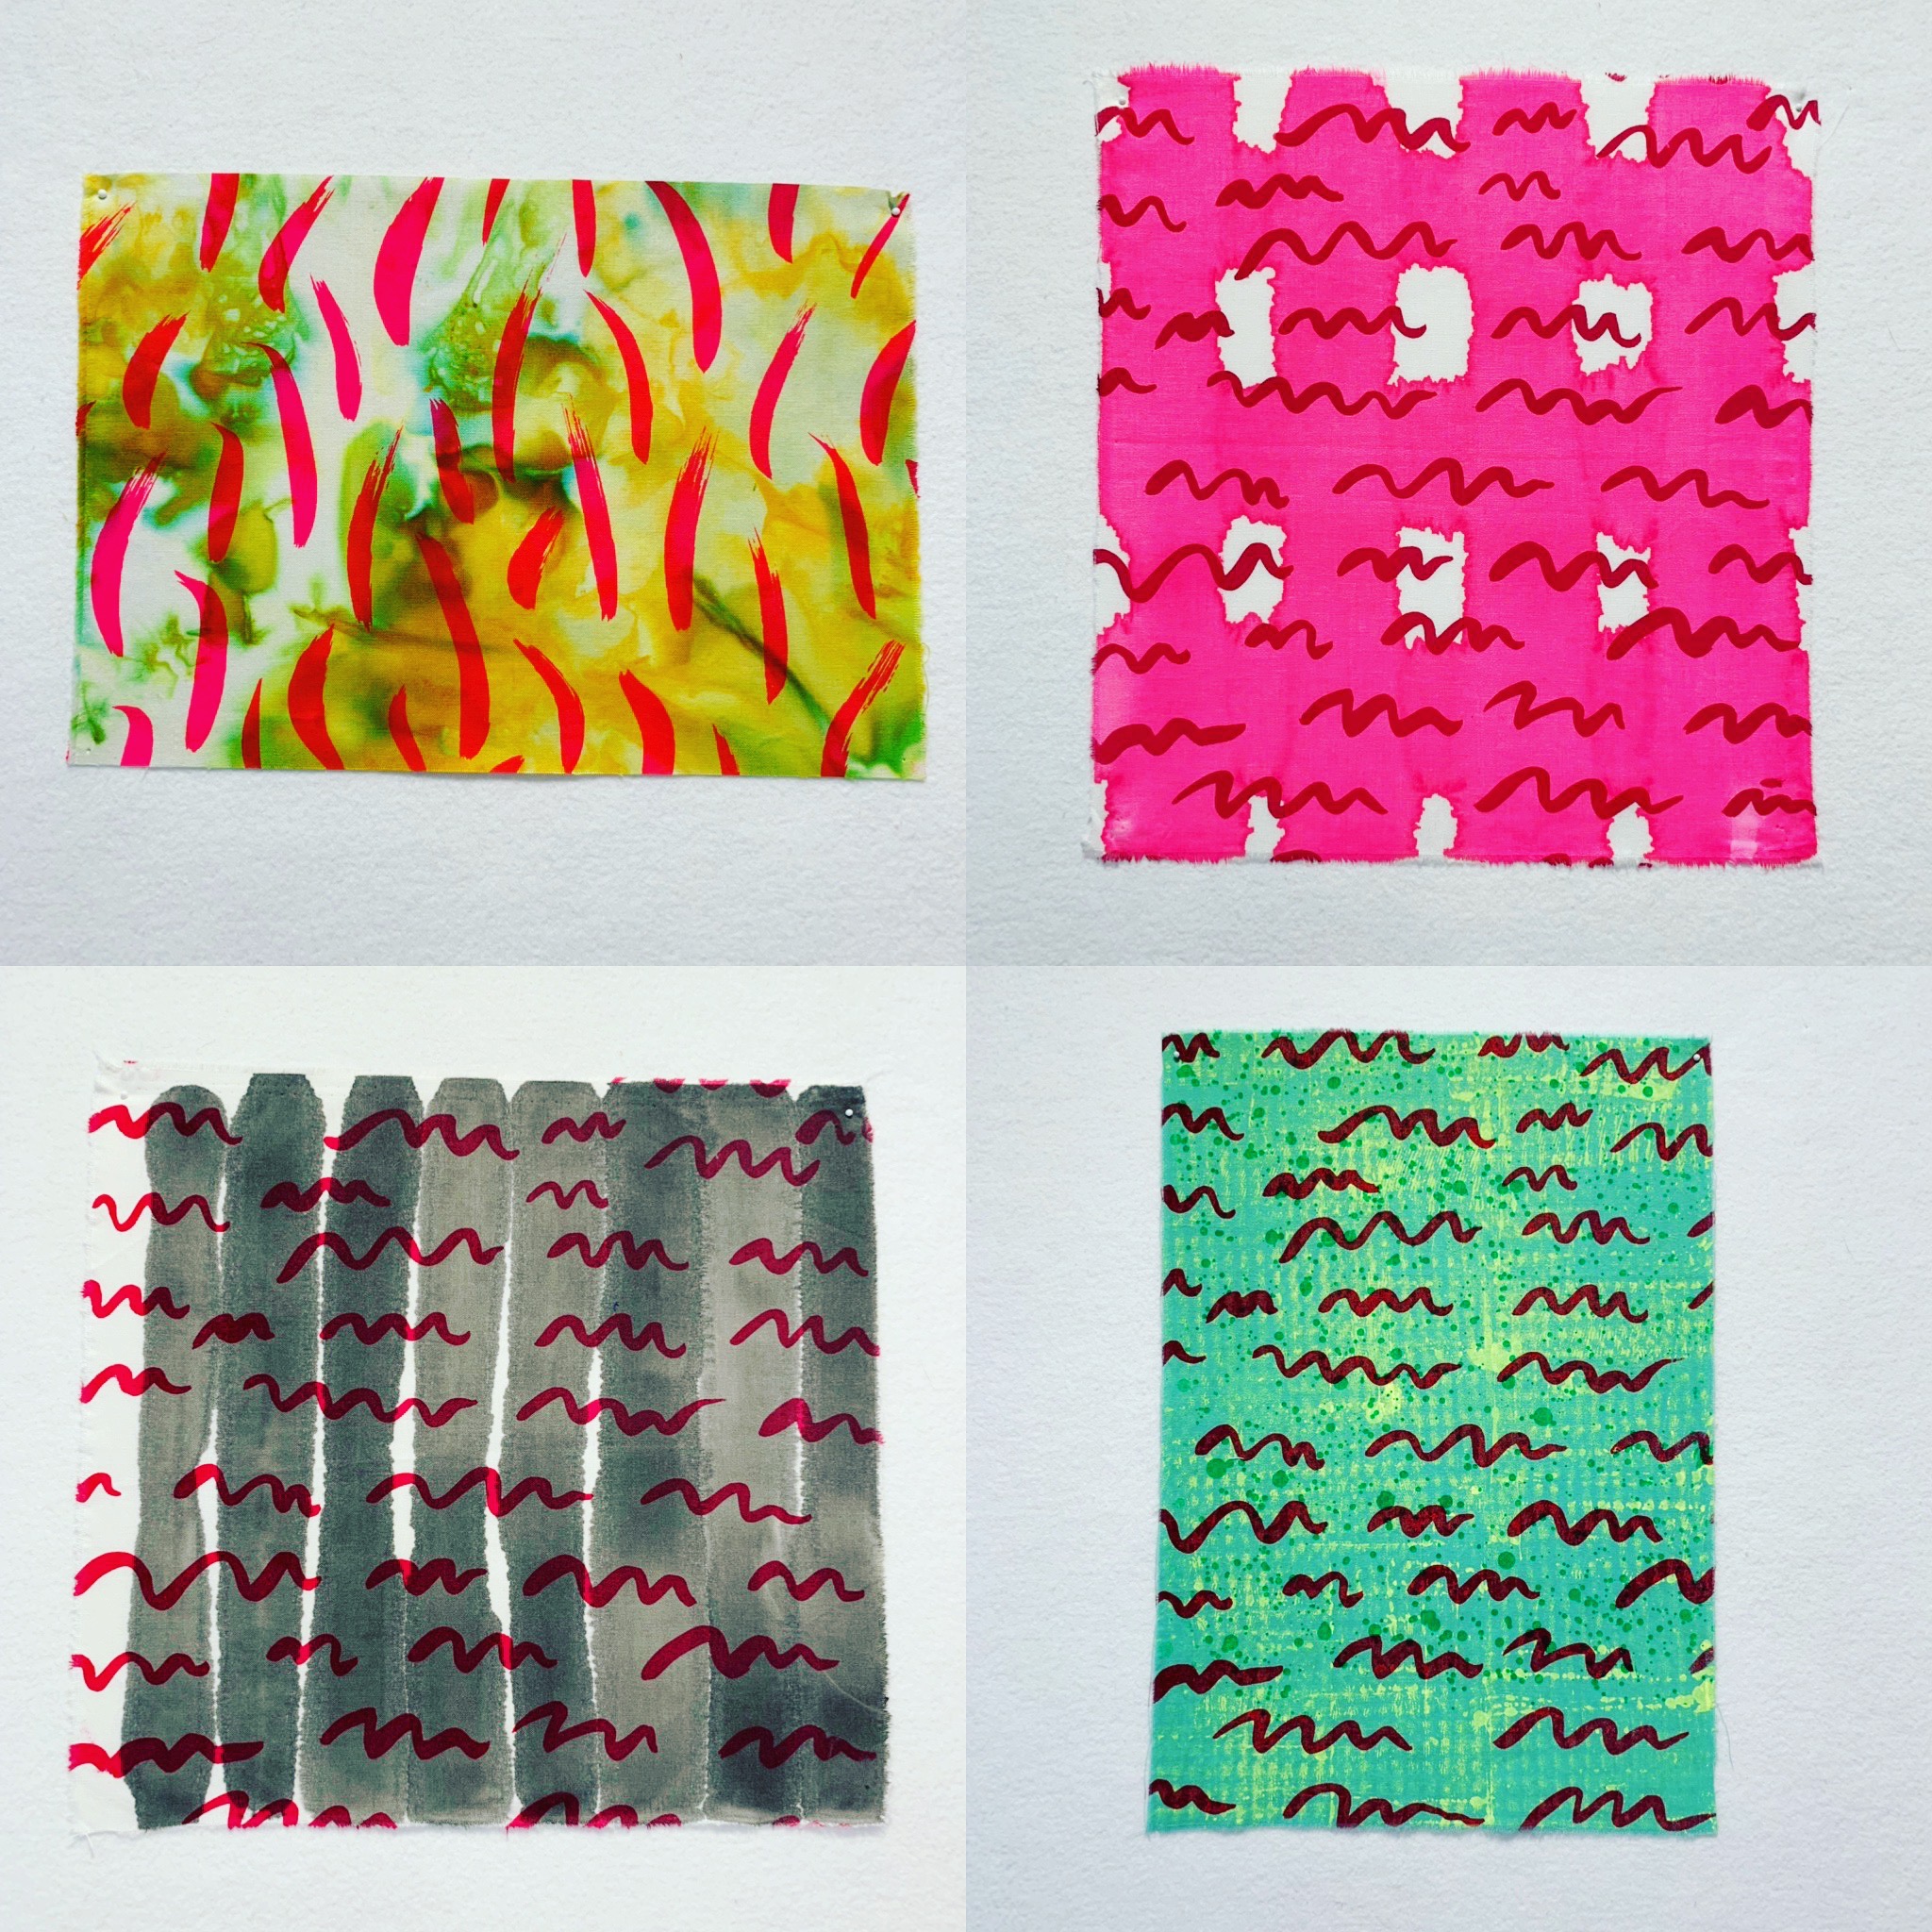
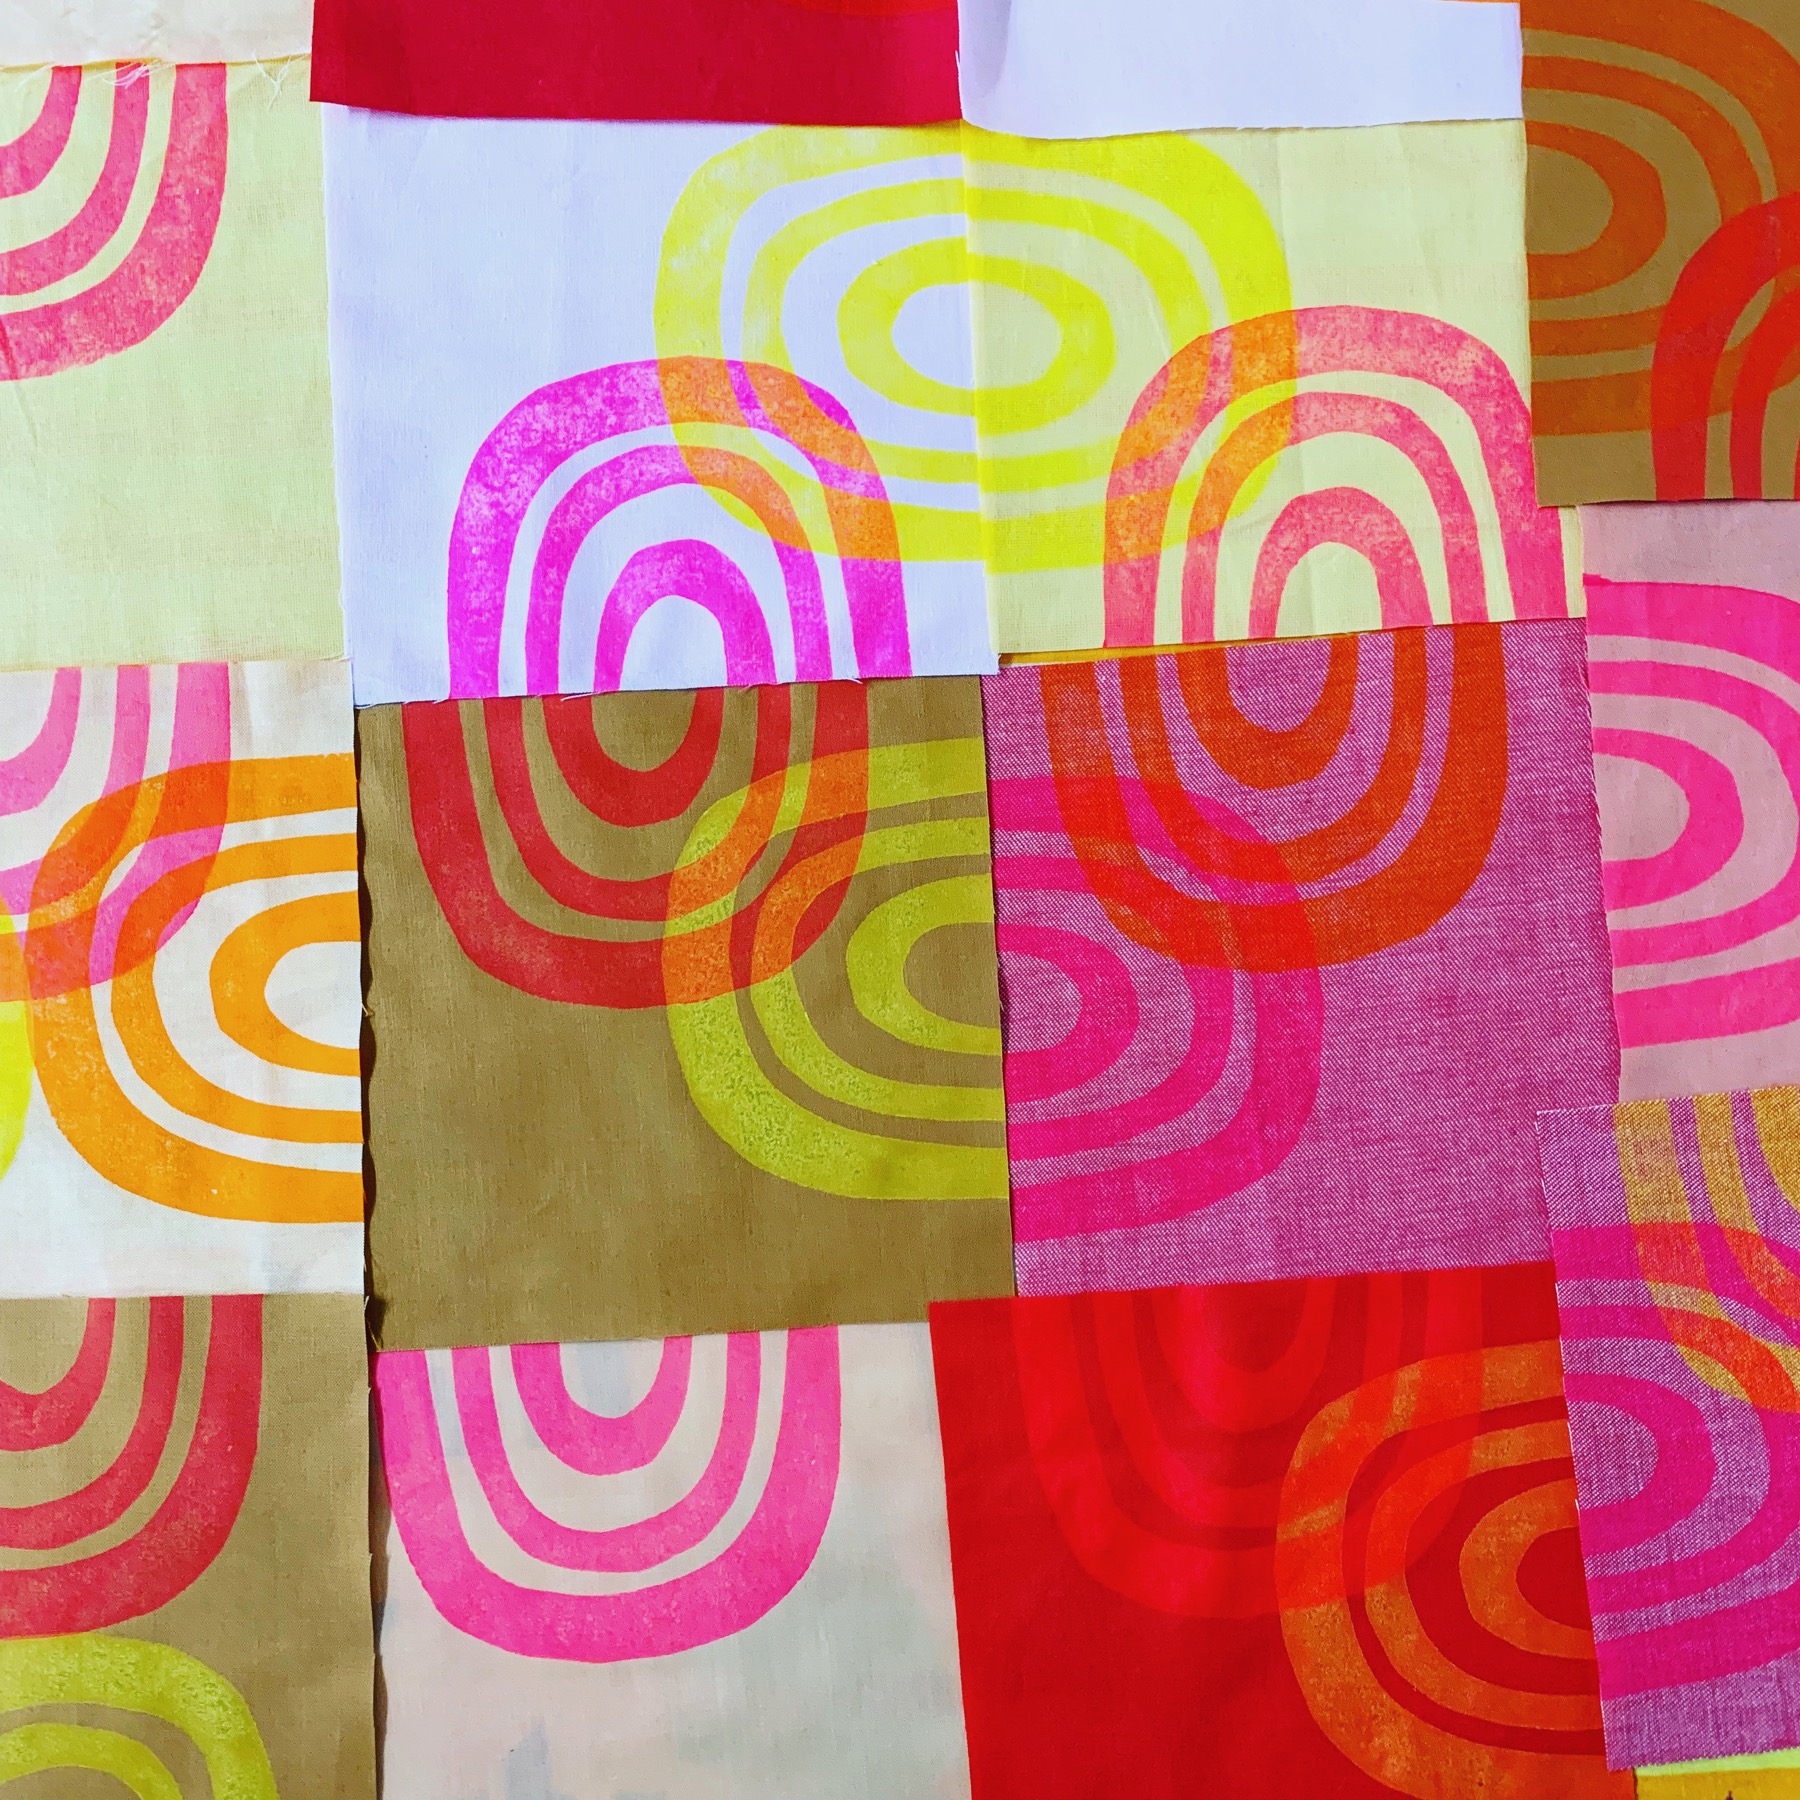
on that note: i recently took a few days on the early end of the last two weeks and printed the half oval striped motifs seen above. it’s more relief printing, a foam image on a scrap of wood, and a variety of fabric screenprinting inks, half of which are neons. i’m printing the motif on three sides of a 6” block and i plan to tesselate them in an attractive way, and hand quilt only some of them. i want to make a mini version first to work out my idea.

do you ever make mini quilts or pieces in order to work out larger ideas before jumping into large, complex quilts or works? i don’t always take the time, but do i find the process making small quilts to be helpful when i do. plus, there’s the added bonus of much more instant gratification… :)

IMG_0264.jpg

52 weeks of surface design: week 7: dyenaflow drips and swipes, and screenprinted layers

November 22, 2018
IMG_0265.jpg

#52weeksofsurfacedesignweek 7: dyenaflow drips and swipes, and screenprinted layers

this week was, again, a busy one. my daughter had veteran’s day off from school, and i was busy toward the end of the week, doing some volunteer work at the San Jose Museum of Quilts and Textiles. the air quality here in my corner of california had also been pretty awful, as a result of the devastating Camp Fire, so spending a lot of time outside printing in my garage seemed like a bad idea.

but i did manage to squeeze in a very tiny bit of play before things too bad. this time i was inspired by some techniques with dyenaflow paint i spotted in Lynn Krawcyzk’s Intentional Printing: a drip motif using a a pipette, and swipe painting, using a foam brush. both techniques are pretty straightforward.

i ordered the pipettes from good old Dharma Trading, and poured a small amount of dyenaflow (from one of their larger size bottles, also from Dharma) into one of those tiny disposable bathroom /dentist(?) water cups and sucked the paint into the pipettes from there rather than straight from the bottle. then it was just a matter of slowly dripping the paint on to the fabric, moving around to make sure the drips were splashed around in a balanced and interesting manner.

the swipes are pretty easy to do as well. i used a dry foam craft brush and worked quickly, making arcs in all directions. i found that as the paint in the brush dries or gets used up it makes a lighter mark on the fabric, which i actually like, because it makes for more variation in value. i used a different disposable cup and foam brush for each color (they are cheap, and i have a huge number of them) when i applied more than one color to a piece, that way i didn’t have to wet and clean the same brush over and over again. i really enjoyed adding more than one color to a piece and layering colors and seeing how different colors interacted with one another to form secondary colors.

while working on white or light neutral fabrics keeps colors pretty pure, it can be kind of boring. it’s fun to use colored fabrics and apply paint on to those fabrics and see how the paint works and layers over that base color. as with the spray painting from week 1, lighter, pastel tones work best for layering colors if you want them to stay fairly pure in tone (like the purple fabric seen in the grid above).

it was also really fun to mix drips and swipes, as seen above. this provides variation in shape/form and keeps things more varied and interesting. plus, drips happen when swiping inadvertently anyway, so if a few happen, there’s no need to panic, just add more and voila, design element! you meant to do it! :)

IMG_0266.jpg

also! i went through my pile of previously printed, dyed, and painted fabrics, looking for pieces that needed some extra love, with the idea of adding more layers of color and pattern.

i decided to add more layers with some screens i had from my lillstreet residency days, featuring some of my hand painted patterns (i painted them with india ink on vellum, and then burned them on to the screens). i like the juxtispostion of the painted and printed motifs, the organic lines of the paint versus the relatively sharp edges of the screened motifs, the varying levels of opaqueness and translucency of the screenprinting ink, and the paint or dye, and again, those unexpected colors that form when two colors meet and mingle, and the illusion of depth that’s achieved with the layering of color and motif.

i’ll definitely be revisiting this kind of thing…i want to see how much layering i can manage without making the fabric into weird muddy soup. :) it’s fun figuring out how far i can go, and when to push forward and when to pull back, searching for the line. if there is one…

IMG_1220.jpg

52 weeks of surface design: weeks 5 and 6: fabric painting with dynaflow

November 12, 2018

#52weeksofsurfacedesignweeks 5 and 6: fabric painting with #dyenaflow

Dye-Na-Flow is a free flowing, super watery, concentrated liquid fabric paint that acts like fabric dye, or somewhat like a watercolor paint, manufactured by @jacquardproducts. i started buying Dye-Na-Flow at my local blick (when i lived in Chicago and had one conveniently located by my grocery store!), but now that i live in the middle of nowhere, i order it online via dharma trading company.

this year I’ve been working through the possibilities with this paint, seeing what it can do: splattering, flicking, making quick concentric circles and stripes with a big brush, and have even put it in spray bottles and sprayed it on to the fabric as well.

i usually start with dry cotton fabric (mostly Kona Snow), and work on top of a blue tarp from Home Depot, which I can easily clean with a wet sponge or baby wipe between pieces. i then quickly start applying paint, without letting colors dry, which leads to a bleeding and blending of colors that i really love.

***

with the concentric circle pieces, i often splash a contrasting color over the top for interest, and then hang the pieces to dry, which adds to the blending of the colors and gives the circles a “splat” like appearance.

over the summer i completed two quilts with these circles, playing on the drunkard’s path block. various other quilts featuring stripes and splatters are still in the works.

IMG_0911.jpg
ACS_0021.jpg
ACS_0022.jpg
IMG_0928.jpg
IMG_1207.jpg
ACS_0031.jpg
ACS_0032.jpg

***

an unexpected and fun variation arose out of the discards and offcuts of the painted striped fabric: a raw edge appliqué motif that suggests the overall idea of a woven piece. when i was prepping pieces paint them with stripes, i simply tore the pieces and got to work. after i was done and the pieces had dried, i started cutting of the edges, thinking it would make piecing easier. but i couldn’t bear to throw the fun offcuts away, so i started playing around! i took a small piece of Kona Snow, sandwiched and quilted it, and then started applying little scraps to the surface, temporarily adhering them with a glue stick, and then a simple top stitch. i’d eventually like to make this quilt again, but on a larger scale.

IMG_1233.jpg
IMG_1260.jpg
IMG_1294.jpg
IMG_1296.jpg
Older Posts →

Latest Posts

Featured
Jul 25, 2022
my approach to color
Jul 25, 2022
Jul 25, 2022
Jul 17, 2022
rope dope dope rope
Jul 17, 2022
Jul 17, 2022
Jul 15, 2022
scrap hoarders anonymous
Jul 15, 2022
Jul 15, 2022
Jul 14, 2022
black and white hand-painted quilt coat
Jul 14, 2022
Jul 14, 2022
Jun 8, 2021
interesting links: june 8 2021
Jun 8, 2021
Jun 8, 2021
May 31, 2021
starting fresh.
May 31, 2021
May 31, 2021

Powered by Squarespace